Coolify is an incredible open source software that enables you to self-host your websites, applications, databases, and other services on your own hardware.
While not as simple as services like Vercel or Laravel Forge, Coolify is more flexible and free of charge - you’ll only be paying the cost of your own servers.
Getting started
This tutorial assumes you already have a server with Coolify installed. The process is generally simple, and the docs provide all the information necessary.
I am using a Hetzner server with 4 GB of memory and 80 GB of storage, which should be more than enough for Coolify and a handful of web applications.
Ensure that your Laravel application is uploaded to Github. The first step will be connecting Coolify to your repositories with a Github app. This allows Coolify to access private repositories and enables automatic deployments.
Create a new project in Coolify. A production environment is automatically created for you. Select the button to add a resource.

Select “Private Repository (with Github App).” You will be prompted to create a new app. This process is straightforward.
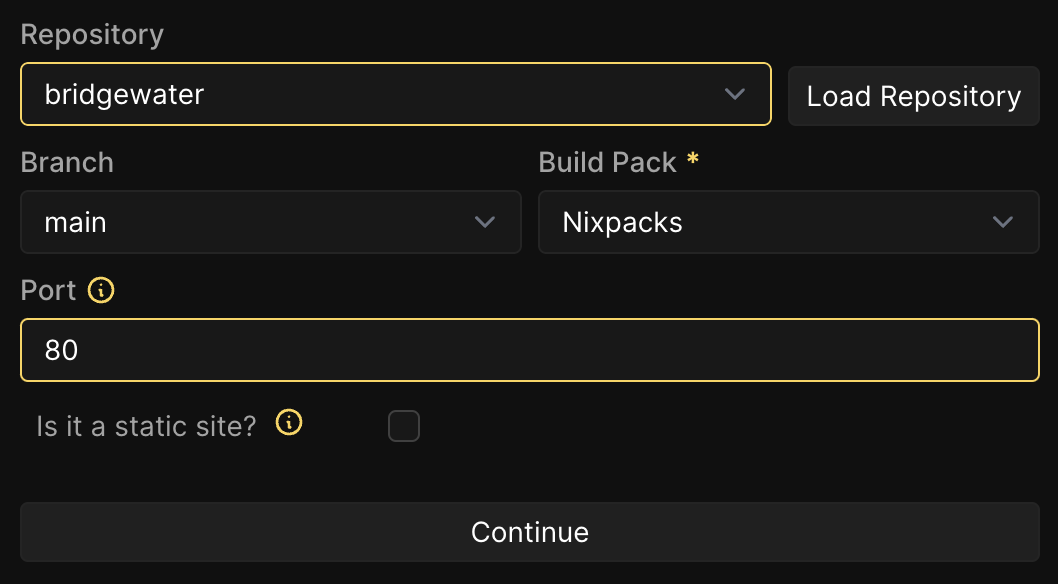
Once the Github App has been created, select it and choose the repository for your Laravel application. Change the port from 3000 to 80. Make sure Nixpacks is selected as the build pack.

Once you reach the next page, head to the environmental variables section. Add an APP_KEY variable for your application. You can generate one locally with the following command:
php artisan key:generate --showAdd any other relevant environmental variables from your local .env file.

Before deploying, we still need to create a database and customize the deployment process. Head back to the Dashboard page and select ”+ Add Resource” on your project. Select a PostgreSQL database. It will automatically be created for you.
Make a note of the password as you will need it soon. Scroll down to the Proxy section and adjust it to match the screenshot below. Start the database using the button in the top right.

Head back to the Environmental Variables for your Laravel application. Add the following variables:
| Variable | Value | Details |
|---|---|---|
| DB_CONNECTION | pgsql | Database driver |
| DB_HOST | Server IP address | |
| DB_PORT | 5432 | Public port for the database |
| DB_DATABASE | postgres | Database name |
| DB_USERNAME | postgres | Database user |
| DB_PASSWORD | Database password |
You can use a tool such as TablePlus or psql to add databases if you would like a specific database for your application.
Finally, we can customize our deployment configuration. Create a nixpacks.toml file in the root directory of your project. Add the following to the file:
[phases.install]
cmds = ["mkdir -p /var/log/nginx && mkdir -p /var/cache/nginx", "composer install --no-dev --no-interaction --prefer-dist --optimize-autoloader --ignore-platform-reqs", "npm i"]

[phases.build]
cmds = ["echo build started", "npm run build", "php artisan migrate --force", "php artisan optimize", "rm -rf node_modules", "echo build ended"]
While not completely necessary, this configuration file improves the commands normally run by Nixpacks during PHP deployment. Save the file and push the changes to Github.
Congratulations! You should now be able to deploy and visit your site.
Next steps
Adding a domain is as simple as creating an A record pointing to your server IP address and adding the domain in the Coolify configuration for your application. Coolify will automatically create a SSL certificate to enable HTTPS for your site.

Troubleshooting
If you run into an error, let’s solve it together! Reach out to me on X with questions or feedback. I will make sure to update this post with any helpful information or anything I may have forgotten to add.